-
Proper cabinet prep matters more than paint brand or sanding
-
Grease, residue, and unstable surfaces cause most paint failures
-
Modern prep methods can replace sanding in many projects
-
Different cabinet materials require different prep strategies
-
Skipping prep leads to peeling, chipping, and uneven finishes
-
Correct prep can extend cabinet paint life by many years
Introduction
When homeowners think about painting kitchen cabinets, they usually focus on paint color, finish type, or whether sanding is necessary. In reality, none of those decisions matter if the cabinets aren’t prepared correctly. Cabinet preparation is the foundation of every successful cabinet painting project, especially when using modern methods like painting cabinets without sanding.
Industry remodeling research and paint-performance testing consistently show that surface prep failures are the leading cause of cabinet paint peeling, chipping, and premature wear. DIY homeowner surveys also reveal a clear pattern: preparation steps are the most commonly skipped part of cabinet painting—and the most frequently regretted once problems appear.
Think of this guide as the prep-focused companion to How to Paint Kitchen Cabinets Without Sanding, covering everything that needs to happen before paint is applied.. Its sole focus is preparation. It does not cover paint application, finishing techniques, or styling choices. Instead, it breaks down exactly how to prep kitchen cabinets for painting so that primer and paint can bond properly, last longer, and deliver professional-level results.
Whether you plan to sand or not, the principles in this guide apply to every cabinet makeover. Prep is not optional—it’s what determines success or failure.
Why Proper Cabinet Prep Matters More Than Sanding
Many DIYers believe sanding is the most important step in cabinet painting. In reality, preparation—not sanding—is what determines whether paint adheres correctly and lasts for years.
What Happens When Cabinets Aren’t Prepped Correctly
When cabinets aren’t properly prepared, paint failures don’t happen randomly. They follow predictable patterns:
-
Peeling around handles and knobs
-
Bubbling near sink cabinets or dishwashers
-
Chipping along door edges and corners
-
Sticky or soft paint that never fully cures
These failures occur because contaminants like grease, oils, cleaning residues, or unstable finishes prevent primer from bonding. Paint sticks only as well as the surface beneath it. If that surface is compromised, sanding alone cannot fix the problem.
Kitchen cabinets are exposed to heat, moisture, airborne grease, and constant hand contact. Over time, invisible residue builds up in layers. Painting over those layers—even on sanded surfaces—creates weak points that fail first.
Prep vs Sanding: Understanding the Difference
Sanding and prep are not the same thing.
-
Sanding creates surface abrasion
-
Preparation creates surface stability and cleanliness
Mechanical abrasion does nothing to remove grease or chemical residue. It also doesn’t fix flaking paint, moisture damage, or contamination trapped in seams. Modern primers rely more on chemical adhesion, which requires clean, stable surfaces—not scratched ones.
That’s why many modern cabinet painting methods reduce or eliminate sanding but never eliminate preparation.
Key Takeaways
-
Most cabinet paint failures are caused by prep mistakes
-
Sanding cannot remove grease or residue
-
Prep quality directly determines durability and lifespan
Identify Your Cabinet Surface Before Prepping
Before starting any prep work, homeowners must identify both the material and condition of their cabinets. Using the wrong prep method for the surface is one of the fastest ways to guarantee failure.
Painted Wood Cabinets
Painted wood cabinets are often the easiest to prep.
If the existing paint is well-adhered, it already provides a sealed, uniform surface that bonding primers can grip effectively. In many cases, repainting over old paint produces better results than painting raw wood.
Before prep:
-
Check for peeling, cracking, or chalky residue
-
Inspect edges and corners where failure starts
-
Test adhesion with light pressure or tape
If paint is intact, spot prep and cleaning are usually sufficient. Full sanding is often unnecessary unless the surface is unstable.
MDF and Engineered Wood Cabinets
MDF and engineered wood cabinets require careful handling during prep.
These materials are dense and smooth, which helps adhesion, but they are extremely sensitive to moisture. Excess water during cleaning can cause swelling, bubbling, or permanent surface damage—especially along seams and edges.
Prep considerations:
-
Use minimal moisture when cleaning
-
Avoid soaking cabinet edges
-
Dry surfaces thoroughly before priming
When treated correctly, MDF cabinets can achieve exceptionally smooth painted finishes.
Laminate and Thermofoil Cabinets
Laminate and thermofoil cabinets are the most challenging to prep.
These surfaces are designed to resist adhesion, making them durable in daily use but difficult to paint. Prep must be meticulous, and expectations should be realistic.
Successful prep requires:
-
Aggressive degreasing
-
Chemical deglossing
-
High-adhesion primer compatibility
If laminate is peeling, lifting, or heat-damaged, painting may not be viable at all. Prep cannot fix delamination.
Key Takeaways
-
Cabinet material affects prep strategy
-
Surface condition matters more than cabinet age
-
Misidentifying the surface leads to paint failure
Step One – Remove Hardware and Protect Surroundings
Proper setup prevents damage, saves time, and ensures prep steps aren’t compromised.
Removing Doors, Drawers, and Hardware
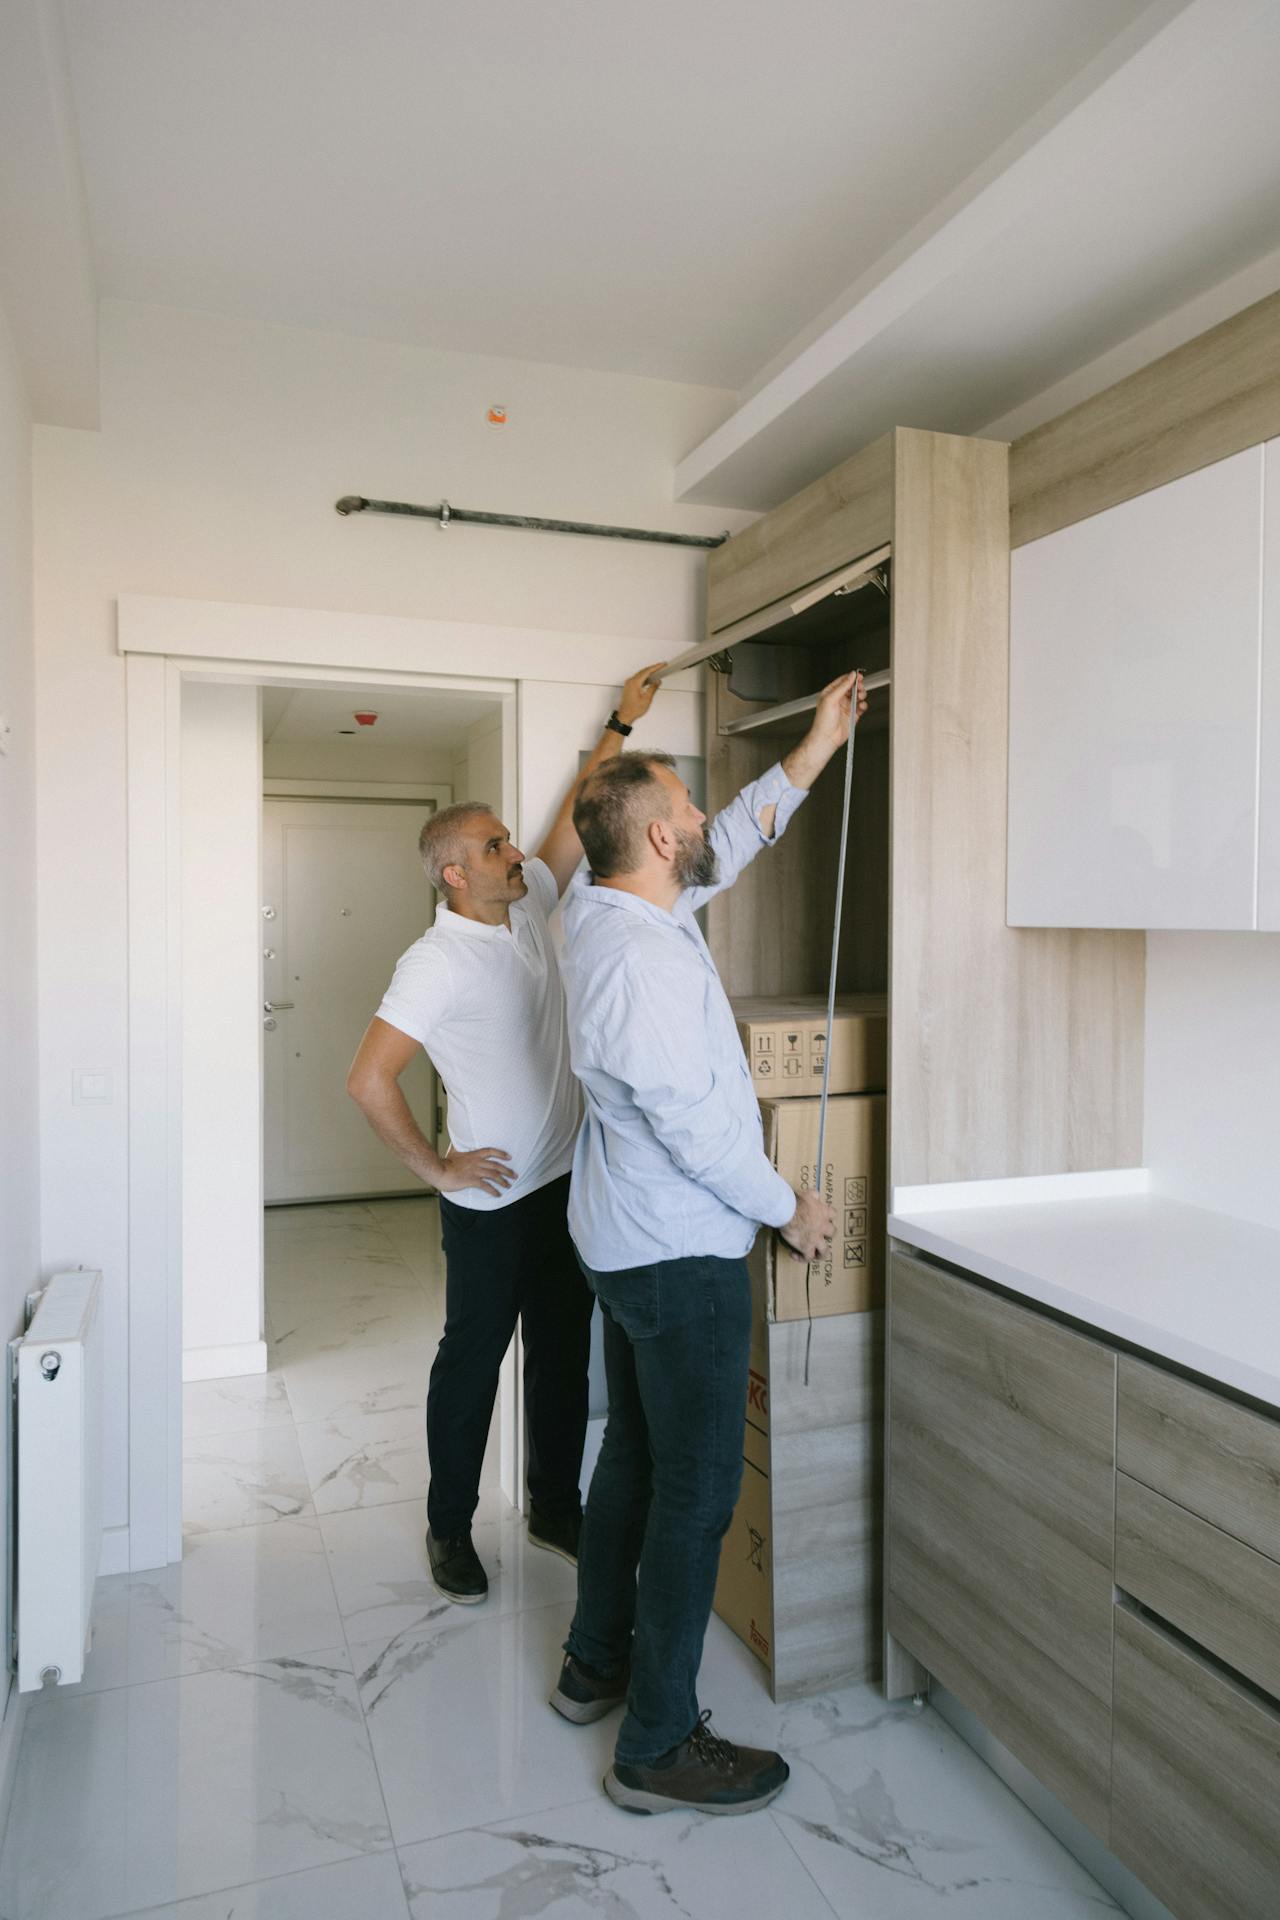
Removing cabinet doors and hardware is not just about convenience—it’s about effectiveness.
Leaving hardware in place creates grease traps around knobs and hinges that are nearly impossible to clean thoroughly. Paint failures almost always begin in these areas.
Best practices:
-
Label each door and drawer
-
Store hardware in labeled bags
-
Photograph layouts for reinstallation
Skipping this step increases prep time later and reduces overall quality.
Masking, Covering, and Workspace Setup
Prep work is messy even without sanding. Protecting surrounding areas prevents contamination and stress.
Setup includes:
-
Covering floors and countertops
-
Masking appliances and walls
-
Creating a clean, controlled workspace
Good setup allows you to focus on prep quality instead of cleanup.
Key Takeaways
-
Organization improves prep quality
-
Hardware removal prevents missed grease zones
-
Workspace setup affects final results
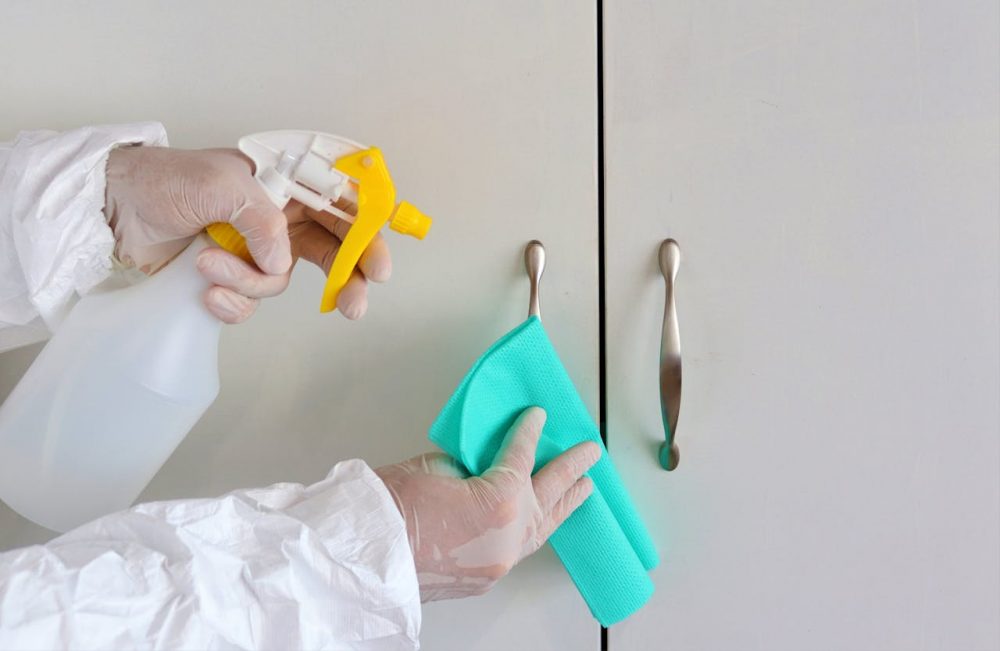
Step Two – Deep Cleaning and Degreasing Cabinets
Degreasing is the most important step in cabinet preparation. No primer or paint can bond properly to greasy surfaces.
Why Kitchen Cabinets Hold Invisible Residue
Kitchen cabinets accumulate more than visible dirt. Layers of residue come from:
-
Cooking oils and steam
-
Hand oils and fingerprints
-
Airborne contaminants
-
Cleaning product buildup
Even cabinets that look clean often have invisible films that block adhesion.
Why Household Cleaners Aren’t Enough
Many common cleaners leave behind surfactants, fragrances, or protective films. These residues interfere with primer bonding and cause paint to peel or fish-eye.
Effective degreasing removes contaminants completely rather than redistributing them across the surface.
Proper Degreasing Techniques
Effective degreasing involves:
-
Using a paint-safe degreaser
-
Wiping with clean cloths frequently
-
Rinsing if required
-
Allowing full drying time
Rushing this step is the most common DIY mistake—and the most expensive to fix later.
Key Takeaways
-
Grease blocks primer adhesion
-
Cleaning must remove residue, not spread it
-
Degreasing determines long-term success
Step Three – Deglossing Instead of Sanding
Chemical deglossers provide a modern alternative to sanding when surfaces are stable.
What Liquid Deglossers Do
Liquid deglossers chemically soften and dull glossy finishes. Instead of scratching the surface, they alter it at a molecular level, allowing primers to bond more effectively.
They are especially useful on:
-
Painted cabinets
-
Factory-finished surfaces
-
Areas where sanding is impractical
When Deglossing Is Enough
Deglossing works best when:
-
Surfaces are intact and stable
-
No peeling or flaking exists
-
Cabinets are previously sealed or painted
Deglossers do not repair damage—they prepare stable surfaces for adhesion.
Safety and Application Best Practices
Deglossers are chemical products and require care:
-
Use proper ventilation
-
Wear gloves
-
Follow dwell-time instructions
Improper use reduces effectiveness and increases health risks.
Key Takeaways
-
Deglossers replace sanding in many projects
-
Proper application is essential
-
Skipping this step increases peeling risk
Step Four – Repairing Surface Imperfections
Small surface defects become highly visible after painting. Repairing them improves both appearance and durability.
Filling Chips, Holes, and Dents
Minor damage should be addressed before priming:
-
Nail holes
-
Small dents
-
Edge chips
Using appropriate fillers creates a smooth, uniform surface that supports paint adhesion.
Caulking Seams and Cabinet Gaps
Caulking improves both aesthetics and performance by sealing gaps where moisture and grease accumulate. Clean seams also give cabinets a more finished, professional appearance.
Key Takeaways
-
Repairs improve adhesion and appearance
-
Small flaws stand out after painting
-
Smooth surfaces last longer
Step Five – Final Surface Check Before Priming

Final inspection ensures that prep work hasn’t introduced new issues.
Touch Tests and Visual Inspection
Before priming:
-
Run your hand over surfaces
-
Check for tackiness or residue
-
Inspect corners and edges
Any remaining contamination will compromise primer adhesion.
Dry Time and Environmental Factors
Humidity and temperature affect drying times. Cabinets must be fully dry before priming to prevent adhesion issues and curing problems.
Key Takeaways
-
Final checks prevent wasted primer
-
Cabinets must be clean, dry, and stable
-
Rushing leads to failure
Conclusion
Knowing how to prep kitchen cabinets for painting is the single most important skill in any cabinet makeover. Paint quality, color choice, and even sanding methods all take a back seat to preparation. Without proper prep, even the most expensive products will fail and lead to issues like peeling and chipping well before their time.
When evaluating home upgrades, smart homeowners compare costs versus returns — and the 2024 Cost vs. Value Report shows that targeted kitchen updates like refinishing or repainting cabinets can contribute meaningfully to overall ROI on kitchen projects, often outperforming more extensive renovations in terms of cost-efficiency and resale appeal.
For professional-level adhesion and finish longevity, understanding paint adhesion test methods and standards — such as cross-hatch or pull-off tests used in coating performance evaluations — helps you select primers and paints that bond reliably to prepared surfaces.
Guidance from leading paint manufacturers reinforces that surface preparation and primer adhesion testing are critical first steps before any topcoat goes on; skipping these undermines paint performance even if sanding was performed.
Done correctly, proper prep transforms cabinet painting from a risky DIY experiment into a reliable, professional-grade upgrade that lasts for years. With the right planning, tools, and prep diligence, your kitchen cabinets will deliver a smooth, durable finish that elevates both daily use and long-term value.
FAQs
Do I still need to prep cabinets if I’m using bonding primer?
Yes. Bonding primers still require clean, grease-free surfaces to work correctly.
How long should cabinets dry after cleaning before priming?
Drying time depends on humidity and ventilation, but cabinets must be completely dry before primer is applied.
Can I prep cabinets without removing doors?
It’s possible, but removing doors allows for more thorough cleaning and better results.
What’s the biggest prep mistake DIYers make?
Skipping or rushing degreasing is the most common and damaging mistake.
Is degreasing more important than sanding?
Yes. Grease prevents adhesion even on sanded surfaces.
Can poor prep ruin expensive cabinet paint?
Absolutely. Prep failures will cause paint to fail regardless of price or quality.